When I think about Christmas and flowers, there is one flower that always comes to mind… the Poinsettia flower (which for years I called and spelled a Pointsetta). It screams Christmas time to me, which as an adult I now find that funny because at this point in my life, because I’ve learned that not only is it a native flower from Mexico, but it is a perennial shrub that can grow as much as 10 feet tall, and the images are stunning! With the holidays, I thought it would be the perfect time to learn How to Paint a Poinsettia Flower acrylic painting, and there is a step by step directions below including a video lesson. This is an easy poinsettia to paint for beginners and would be fun for the kids to try too!

This post contains affiliate links, see our sponsor and affiliate disclosure here.
This flower is actually so much easier to paint than it looks! The red “petals” are actually leaves of the plant called bracts, and the real flowers are the tiny, yellow buds in the center, but we’ll still refer to the red parts as petals interchangeably when painting, it makes it much easier. A good place to start is by sketching out the flower layout on the blank canvas first. There is a template of this exact flower petal layout at the end of the post.

Supplies to paint easy poinsettias with acrylic paint: The craft paint colors I used were Deep Burgundy, Hauser Dark Green, Burnt Umber, Hauser Medium Green, Light Buttermilk, and Antique Gold (Yellow Ochre), White Titanium. A round brush and a liner brush, water, paper towel to dry your brushes and a primed canvas… or Find them here.

When I sketch an image or outline for a painting, I use a watercolor pencil. It easily blends into the paint and there are no residual pencil lines. If you want to try free-hand, the petal and leaf shapes are basic teardrop shapes of difference sizes. Once your poinsettia outline is sketched, you are ready to start painting in the largest red bracts.

I used craft paint for this Poinsettia acrylic painting because it’s accessible to everyone…however, you can also use regular artist acrylic paint as well. While I picked Deep Burgundy for my red petals; feel free to use a cadmium red or even naphthol crimson in artist acrylic, or a bright red hue in craft paint. You can use any paint brush, but using a larger brush will show less paint strokes.
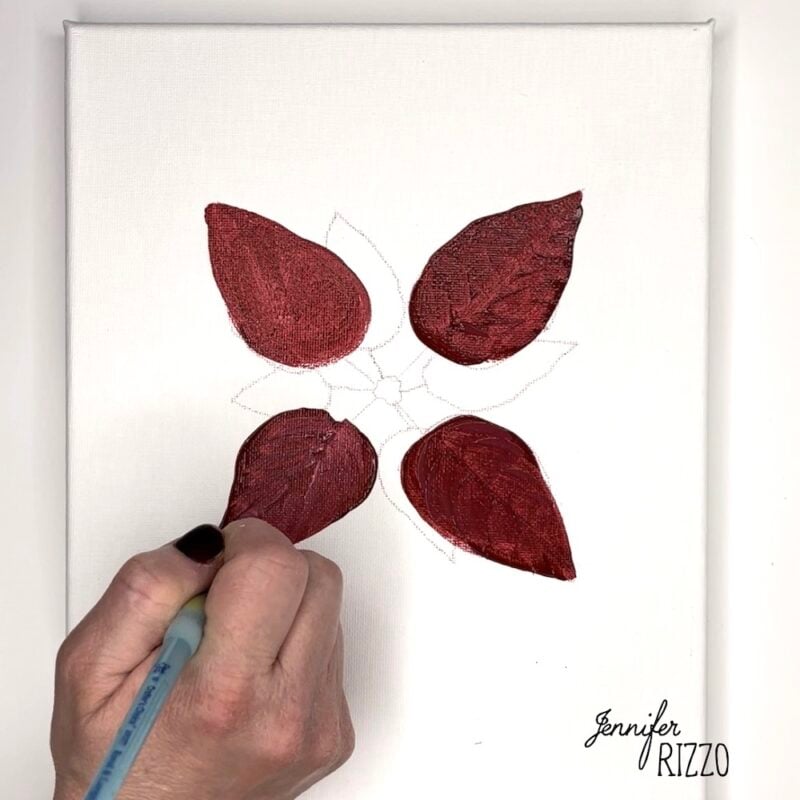
Paint the largest red petals first with a 50/50 mixture of Deep Burgundy and Burnt Umber. This will serve as a darker shade of red. After painting in the larger set of petals, load the round brush up with paint and make short strokes moving from the inside in a diagonal line from the center of the petal to the outside. This will add texture and the appearance of veins to the bracts.
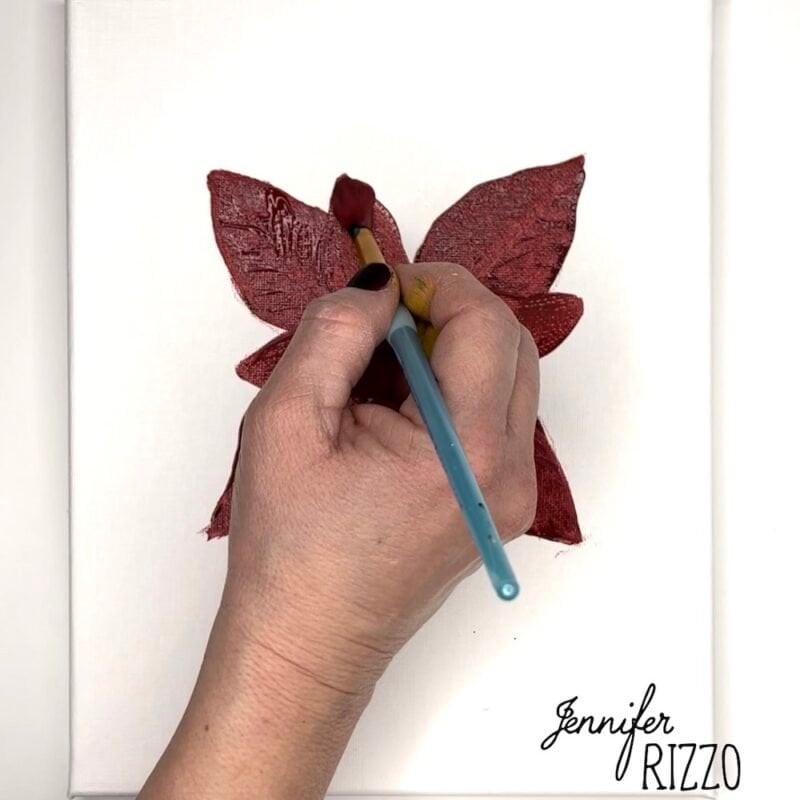
Step two is painting the petals that are the next size down. Paint these with straight Deep Burgundy as a red medium hue. I used the tip of my brush to paint the red, skinny part of the petal from the base of the bract to the center, but you can also use an angle brush or liner brush if you are more comfortable.
Love painting flowers? See how to paint a Sunflower

While the red petals dry, use a brush and the Burnt Umber paint to make a slight stippling motion to create small circles in the center as a base for the flower center. Make sure to use a dry brush when changing colors, especially with craft paint.

Dot over that with Yellow Ochre (Antique Gold) which is a yellow medium hue. To make the dots more defined, flip the brush over and dip the end of the brush in paint and lightly touch the canvas with the yellow paint.

You can repeat the same painting technique with the dark green paint and white paint. This creates the flower center and adds dimension to the center of the flower.

Mix 3 parts red and 1 part white paint to create a lighter red color, it will be almost a dark pink shade. Paint smaller petals around the top of the flower head with the lighter color. The Light Buttermilk can also be sued at this time to create some diffuse highlights on the petals in a diagonal pattern.

While all of the petals and center are drying, now is a good time to add some green leaves. I used Hauser Dark Green but you can also use Green Hue Permanent to paint in the leaves. To paint poinsettia leaves, basically make squiggly triangles with a little bend to them. Leaves in nature aren’t perfect, and so ours won’t be either, and that’s a good thing! Use the same paint technique that was used to create the texture on the petals to create texture on the leaves. Once they are painted, paint the background of your canvas. I used Hauser Medium Green for a vintage look, but straight (Mars) black paint would also be striking with these beautiful Christmas flowers.

The center should be not as wet at this point. Fill in any white spaces with a thin liner brush with Burnt Umber. This will help create a shadow in the center.

This is where the white paint and detail work comes in to make your poinsettia flower really pop. Using white paint, take your liner brush with a little paint on the tip, and line the edges of the poinsettia to create highlights. If you look at the flower bract, I lined one edge and or a center line, on the lower petals, and on the smaller petals I created curved lines to mimic flower petal veining.
I also went back with a little Burnt Umber and added a shadow at the base of the larger petals and on the leaves. The shading helps it to look dimensional and add depth. don’t be afraid to try variations of adding more or less white and red. There are so many gorgeous colors of poinsettia flowers from creamy white, speckled and pink to an almost green color.
Once you master painting one Poinsettia flower, you are ready to paint a bunch of them! The cluster in nature, so don’t be afraid to place your flowers too close together. You can also paint other pine branches or painted embellishments to create a Christmas bouquet as well. Once you get the hang of How to Paint a Poinsettia Flower acrylic painting, they would be gorgeous on a handmade Christmas card!
To transfer the poinsettia template, you can use either graphite paper, or rub a watercolor pencil across the back and trace over it to transfer it to the surface of the canvas.


The post How to Paint a Poinsettia Flower Acrylic Painting appeared first on Jennifer Rizzo.